
ที่จริงอยากจะเขียนเรื่องนี้เอาไว้สักพักแหละ เพราะติดปัญหานี้อยู่พอดีระหว่างการย้าย Server ไปยังผู้ให้บริการ Iass รายใหม่ เป็นการสร้าง Instance เครื่องเดียว ในเครื่องนั้นประกอบไปด้วย Docker Container ตามโปรเจ็คที่ทำงานอยู่ ถือว่าใช้งานเม็ดเงินให้คุ้มค่าแล้วกัน ทีนี้จำเป็นต้องทำ Reverse Proxy เพื่อ Forward ต่อเข้าไปใน Container ที่มี Web Application อยู่ + อยากได้ SSL แบบเขียวๆ ไม่แดงพอดี เลยหาวิธีทำและมาบอกกล่าวกันครับ เอาหล่ะ ผมจะเล่าให้ฟังเป็นขั้นๆไปนะครับ
ติดตั้ง Package ที่จำเป็นก่อนการติดตั้ง
เราจะต้องติดตั้ง Package ที่จะใช้ในการติดตั้งก่อน โดย Package พวกนี้จะใช้ในการดึงตัวติดตั้ง Let’s Encrypt มาจาก Repository โดยใช้คำสั่งนี้
apt-get -y install git bc |
หลังจากนั้น ให้ทำการ Clone Project Let’s Encrypt มาจาก github และบันทึกลงใน Path /opt/letsencrypt โดยใช้คำสั่ง
git clone https://github.com/letsencrypt/letsencrypt /opt/letsencrypt |
หลังจากการ Clone เสร็จสิ้น ตัวติดตั้ง Let’s Encrypt จะอยู่ใน Path /opt/letsencrypt
ติดตั้ง Nginx
เราจะทำการติดตั้ง Nginx โดยใช้คำสั่ง
apt-get -y install nginx |
หลังจากติดตั้ง Nginx เสร็จแล้ว ให้เข้าไปแก้ไขไฟล์ Configuration สำหรับทำ Virtual Host (หรือจะเรียกอีกชื่อว่า Server Blocks ก็ได้นะ) ขึ้นมาครับ แต่โดยปกติแล้ว Nginx หลังติดตั้ง จะให้ไฟล์ Configuration ที่เป็น Virtual Host มาไฟล์เดียว คือไฟล์ “default” เราสามารถคัดลอกไฟล์นี้ แล้วสร้างเป็นไฟล์ใหม่ขึ้นมาได้ เพื่อเพิ่ม Virtual Host ขึ้นมา (Virtual Host มีประโยชน์คือ ทำให้เครื่อง Server ของเราเครื่องเดียว สามารถมีเว็บไซต์ที่จดทะเบียน Domain ต่างกันทำงานใน Server ของเราหลาย Domain ได้ พูดง่ายๆเป็นภาษาบ้านๆ ไม่ซับซ้อน ก็คือ สามารถให้บริการเว็บไซต์หลายๆเว็บได้ใน Server เครื่องเดียว) โดยปกติแล้ว ไฟล์ Virtual Host จะถูกเก็บไว้ใน Path
/etc/nginx/sites-enabled/
ในที่นี้ จะยกตัวอย่างการแก้ไขไฟล์ “default” ให้ดูก่อนเพื่อเป็นการยกตัวอย่างนะครับ โดยการแก้ไขสามารถใช้คำสั่ง
nano /etc/nginx/sites-enabled/default |
คุณจะได้ไฟล์คร่าวๆ หน้าตาประมาณนี้ครับ
server {

            #replace  with your ip address.
            #Otherwise, to listen on all interfaces on port 80 with IPv4,
            #remove ':'
            listen   80; ## listen for ipv4; this line is default and implied
            #listen   [::]:80 default ipv6only=on; ## listen for ipv6.

            #location of your files, replace /srv with the location of the files that you want to serve
            root /usr/share/nginx/html;
            #The index files. If you want, you can add others such as index.php, index.cgi, .etc .etc
            index index.html index.htm;

            # The name of your domain (virtual hosts). Change 'localhost' to the domain that you are hosting
            server_name localhost;

            location / {
                    # First attempt to serve request as file, then
                    # as directory, then fall back to a 404 error
                    try_files $uri $uri/ =404;
                    # uncomment the line below to enable directory indexes
                    # NOT recommended unless you know what you're doing.
                    #autoindex on;
            }

            #error_page 404 /404.html;

            # redirect server error pages to the static page /50x.html
            #
            #error_page 500 502 503 504 /50x.html;
            #location = /50x.html {
            #       root /usr/share/nginx/www;
            #}

            # pass the PHP scripts to FastCGI server listening on 127.0.0.1:9000
            #
            #location ~ \.php$ {
            #       fastcgi_split_path_info ^(.+\.php)(/.+)$;
            #        # NOTE: You should have "cgi.fix_pathinfo = 0;" in php.ini
            #
            #        # With php5-cgi alone:
            #       fastcgi_pass 127.0.0.1:9000;
                    # With php5-fpm:
            #       fastcgi_pass unix:/var/run/php5-fpm.sock;
            #       fastcgi_index index.php;
            #        include fastcgi_params;
            #}

            # deny access to .htaccess files, if Apache's document root
            # concurs with nginx's one
            #
            location ~ /\.ht {
                    deny all;
            }
    }
ให้ใส่ข้อความตามตัวอักษรสีแดงเพิ่มลงไป เพื่อใช้ในการตรวจสอบ Domain ของทาง Let’s Encrypt ครับ
server {

            #replace  with your ip address.
            #Otherwise, to listen on all interfaces on port 80 with IPv4,
            #remove ':'
            listen   80; ## listen for ipv4; this line is default and implied
            #listen   [::]:80 default ipv6only=on; ## listen for ipv6.

            #location of your files, replace /srv with the location of the files that you want to serve
            root /usr/share/nginx/html;
            #The index files. If you want, you can add others such as index.php, index.cgi, .etc .etc
            index index.html index.htm;

            # The name of your domain (virtual hosts). Change 'localhost' to the domain that you are hosting
            server_name localhost;

            location / {
                    # First attempt to serve request as file, then
                    # as directory, then fall back to a 404 error
                    try_files $uri $uri/ =404;
                    # uncomment the line below to enable directory indexes
                    # NOT recommended unless you know what you're doing.
                    #autoindex on;
            }

            location ~ /.well-known {
                allow all;
            }

            #error_page 404 /404.html;

            # redirect server error pages to the static page /50x.html
            #
            #error_page 500 502 503 504 /50x.html;
            #location = /50x.html {
            #       root /usr/share/nginx/www;
            #}

            # pass the PHP scripts to FastCGI server listening on 127.0.0.1:9000
            #
            #location ~ \.php$ {
            #       fastcgi_split_path_info ^(.+\.php)(/.+)$;
            #        # NOTE: You should have "cgi.fix_pathinfo = 0;" in php.ini
            #
            #        # With php5-cgi alone:
            #       fastcgi_pass 127.0.0.1:9000;
                    # With php5-fpm:
            #       fastcgi_pass unix:/var/run/php5-fpm.sock;
            #       fastcgi_index index.php;
            #        include fastcgi_params;
            #}


            # deny access to .htaccess files, if Apache's document root
            # concurs with nginx's one
            #
            location ~ /\.ht {
                    deny all;
            }
    }
หลังจากนั้น ให้ทำการ reload service ของ Nginx หลังจากแก้เรื่อง Configuration เสร็จแล้ว ด้วยคำสั่ง
service nginx reload |
เริ่มให้ Let’s Encrypt สร้างใบรับรอง
หลังจากนั้น เราจะใช้คำสั่ง เพื่อเริ่มให้ Let’s Encrypt สร้างใบรับรองให้กับ Domain ของเราที่เราต้องการ โดยใช้คำสั่ง
cd /opt/letsencrypt ./letsencrypt-auto certonly -a webroot --webroot-path=/usr/share/nginx/html -d example.com -d www.example.com |
โดยเปลี่ยนจาก example.com เป็น Domain ของคุณได้เลยครับ
หลังจากนั้นแล้ว คุณจะเห็นหน้าต่างสำหรับใส่ Email Address ของคุณลงไป
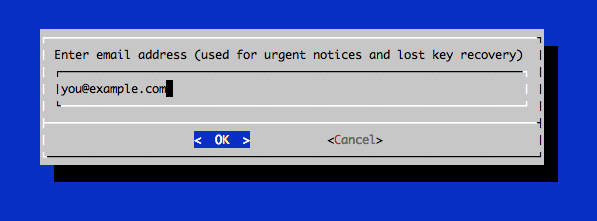
https://assets.digitalocean.com/articles/letsencrypt/le-email.png
หลังจากนั้น คุณจะต้องยอมรับ Let’s Encrypt Subscribe Agreement โดยการเลือก Agree
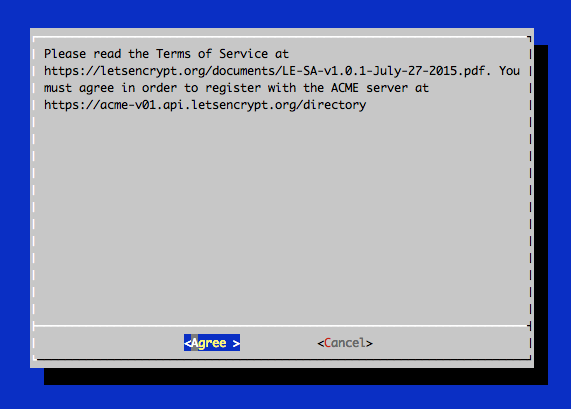
https://assets.digitalocean.com/articles/letsencrypt/le-agreement.png
หากคุณทำงานบน Docker Container Apache ที่มาจาก Official Hub หากตอน Run ตัว letsencrypt-auto แล้วเกิด Error PythonDialogBug ให้ทำการ set environment ของตัว term ก่อน โดยใช้คำสั่ง export term=xterm แล้วจึง Run ตัว letsencrypt-auto อีกครั้ง
หลังจาก Run ตัว letsencrypt-auto แล้วไม่มีอะไรผิดพลาด จะได้ข้อความประมาณนี้ครับ
IMPORTANT NOTES:
 - If you lose your account credentials, you can recover through
   e-mails sent to [email protected]
 - Congratulations! Your certificate and chain have been saved at
   /etc/letsencrypt/live/example.com/fullchain.pem. Your
   cert will expire on 2016-03-15. To obtain a new version of the
   certificate in the future, simply run Let's Encrypt again.
 - Your account credentials have been saved in your Let's Encrypt
   configuration directory at /etc/letsencrypt. You should make a
   secure backup of this folder now. This configuration directory will
   also contain certificates and private keys obtained by Let's
   Encrypt so making regular backups of this folder is ideal.
 - If like Let's Encrypt, please consider supporting our work by:

   Donating to ISRG / Let's Encrypt:   https://letsencrypt.org/donate
   Donating to EFF:                    https://eff.org/donate-le
คุณจะได้ Path ของใบรับรองที่ Generate มา และวันหมดอายุของใบรับรองนั้น โดยอายุจะอยุ่ที่ 3 เดือน สามารถต่อได้ไม่จำกัดครั้งครับ หลังจากนั้น เราจะเอา Certificate ไปใส่ให้กับ Nginx กันครับ
ใส่ใบรับรองให้กับ Nginx
ให้คุณใส่ใบรับรองพร้อมเปิดใช้งาน HTTPS ให้กับ Nginx ครับ โดยเราจะเข้าไปแก้ไขไฟล์ Configuration ของ Virtual Host ในที่นี่เราใช้ “default”
nano /etc/nginx/sites-available/default |
server {

            #replace  with your ip address.
            #Otherwise, to listen on all interfaces on port 80 with IPv4,
            #remove ':'
            #listen   80; ## listen for ipv4; this line is default and implied
            #listen   [::]:80 default ipv6only=on; ## listen for ipv6.
            listen 443 ssl;

            #location of your files, replace /srv with the location of the files that you want to serve
            root /usr/share/nginx/html;
            #The index files. If you want, you can add others such as index.php, index.cgi, .etc .etc
            index index.html index.htm;

            # The name of your domain (virtual hosts). Change 'localhost' to the domain that you are hosting
            server_name example.com www.example.com;

            location / {
                    # First attempt to serve request as file, then
                    # as directory, then fall back to a 404 error
                    try_files $uri $uri/ =404;
                    # uncomment the line below to enable directory indexes
                    # NOT recommended unless you know what you're doing.
                    #autoindex on;
            }

            location ~ /.well-known {
                allow all;
            }

            #error_page 404 /404.html;

            # redirect server error pages to the static page /50x.html
            #
            #error_page 500 502 503 504 /50x.html;
            #location = /50x.html {
            #       root /usr/share/nginx/www;
            #}

            # pass the PHP scripts to FastCGI server listening on 127.0.0.1:9000
            #
            #location ~ \.php$ {
            #       fastcgi_split_path_info ^(.+\.php)(/.+)$;
            #        # NOTE: You should have "cgi.fix_pathinfo = 0;" in php.ini
            #
            #        # With php5-cgi alone:
            #       fastcgi_pass 127.0.0.1:9000;
                    # With php5-fpm:
            #       fastcgi_pass unix:/var/run/php5-fpm.sock;
            #       fastcgi_index index.php;
            #        include fastcgi_params;
            #}


            # deny access to .htaccess files, if Apache's document root
            # concurs with nginx's one
            #
            location ~ /\.ht {
                    deny all;
            }

            ssl_certificate /etc/letsencrypt/live/example.com/fullchain.pem;
            ssl_certificate_key /etc/letsencrypt/live/example.com/privkey.pem;
            ssl_protocols TLSv1 TLSv1.1 TLSv1.2;
            ssl_prefer_server_ciphers on;
            ssl_ciphers 'ECDHE-RSA-AES128-GCM-SHA256:ECDHE-ECDSA-AES128-GCM-SHA256:ECDHE-RSA-AES256-GCM-SHA384:ECDHE-ECDSA-AES256-GCM-SHA384:DHE-RSA-AES128-GCM-SHA256:DHE-DSS-AES128-GCM-SHA256:kEDH+AESGCM:ECDHE-RSA-AES128-SHA256:ECDHE-ECDSA-AES128-SHA256:ECDHE-RSA-AES128-SHA:ECDHE-ECDSA-AES128-SHA:ECDHE-RSA-AES256-SHA384:ECDHE-ECDSA-AES256-SHA384:ECDHE-RSA-AES256-SHA:ECDHE-ECDSA-AES256-SHA:DHE-RSA-AES128-SHA256:DHE-RSA-AES128-SHA:DHE-DSS-AES128-SHA256:DHE-RSA-AES256-SHA256:DHE-DSS-AES256-SHA:DHE-RSA-AES256-SHA:AES128-GCM-SHA256:AES256-GCM-SHA384:AES128-SHA256:AES256-SHA256:AES128-SHA:AES256-SHA:AES:CAMELLIA:DES-CBC3-SHA:!aNULL:!eNULL:!EXPORT:!DES:!RC4:!MD5:!PSK:!aECDH:!EDH-DSS-DES-CBC3-SHA:!EDH-RSA-DES-CBC3-SHA:!KRB5-DES-CBC3-SHA';
           ssl_session_timeout 1d;
           ssl_session_cache shared:SSL:50m;
           ssl_stapling on;
           ssl_stapling_verify on;
           add_header Strict-Transport-Security max-age=15768000;

    }

server {
    listen 80;
    server_name example.com www.example.com;
    return 301 https://$host$request_uri;
}
อย่าลืมแก้ตัว example.com เป็น Domain ของคุณนะครับ หลังจากเปลี่ยนเรียบร้อยแล้ว อย่าลืม Save และ Reload service nginx ใหม่นะครับ โดยคำสั่ง
service nginx reload |
มาตั้งค่า Reverse Proxy ให้ Nginx กัน
คราวนี้จะเป็นการตั้งค่า Reverse Proxy ให้กับ Nginx กันครับ โดยทำการแก้ไขไฟล์ Configuration ของ Virtual Host ในที่นี่เราใช้ “default” โดยใช้คำสั่ง
nano /etc/nginx/sites-available/default |
หลังจากนั้น ให้ทำการเพิ่มข้อความที่ใช้ทำ Reverse Proxy ครับ
server {

            #replace  with your ip address.
            #Otherwise, to listen on all interfaces on port 80 with IPv4,
            #remove ':'
            #listen   80; ## listen for ipv4; this line is default and implied
            #listen   [::]:80 default ipv6only=on; ## listen for ipv6.
            listen 443 ssl;

            #location of your files, replace /srv with the location of the files that you want to serve
            root /usr/share/nginx/html;
            #The index files. If you want, you can add others such as index.php, index.cgi, .etc .etc
            index index.html index.htm;

            # The name of your domain (virtual hosts). Change 'localhost' to the domain that you are hosting
            server_name example.com www.example.com;

            location / {
                    # First attempt to serve request as file, then
                    # as directory, then fall back to a 404 error
                    try_files $uri $uri/ =404;
                    # uncomment the line below to enable directory indexes
                    # NOT recommended unless you know what you're doing.
                    #autoindex on;
            }

            location ~ /.well-known {
                allow all;
            }

            location / {
                proxy_set_header X-Real-IP  $remote_addr;
                proxy_set_header X-Forwarded-For $remote_addr;
                proxy_set_header Host $host;
                proxy_pass << เครื่องภายในที่ Web Application ทำงานอยู่ >>;
            }

            #error_page 404 /404.html;

            # redirect server error pages to the static page /50x.html
            #
            #error_page 500 502 503 504 /50x.html;
            #location = /50x.html {
            #       root /usr/share/nginx/www;
            #}

            # pass the PHP scripts to FastCGI server listening on 127.0.0.1:9000
            #
            #location ~ \.php$ {
            #       fastcgi_split_path_info ^(.+\.php)(/.+)$;
            #        # NOTE: You should have "cgi.fix_pathinfo = 0;" in php.ini
            #
            #        # With php5-cgi alone:
            #       fastcgi_pass 127.0.0.1:9000;
                    # With php5-fpm:
            #       fastcgi_pass unix:/var/run/php5-fpm.sock;
            #       fastcgi_index index.php;
            #        include fastcgi_params;
            #}


            # deny access to .htaccess files, if Apache's document root
            # concurs with nginx's one
            #
            location ~ /\.ht {
                    deny all;
            }

            ssl_certificate /etc/letsencrypt/live/example.com/fullchain.pem;
            ssl_certificate_key /etc/letsencrypt/live/example.com/privkey.pem;
            ssl_protocols TLSv1 TLSv1.1 TLSv1.2;
            ssl_prefer_server_ciphers on;
            ssl_ciphers 'ECDHE-RSA-AES128-GCM-SHA256:ECDHE-ECDSA-AES128-GCM-SHA256:ECDHE-RSA-AES256-GCM-SHA384:ECDHE-ECDSA-AES256-GCM-SHA384:DHE-RSA-AES128-GCM-SHA256:DHE-DSS-AES128-GCM-SHA256:kEDH+AESGCM:ECDHE-RSA-AES128-SHA256:ECDHE-ECDSA-AES128-SHA256:ECDHE-RSA-AES128-SHA:ECDHE-ECDSA-AES128-SHA:ECDHE-RSA-AES256-SHA384:ECDHE-ECDSA-AES256-SHA384:ECDHE-RSA-AES256-SHA:ECDHE-ECDSA-AES256-SHA:DHE-RSA-AES128-SHA256:DHE-RSA-AES128-SHA:DHE-DSS-AES128-SHA256:DHE-RSA-AES256-SHA256:DHE-DSS-AES256-SHA:DHE-RSA-AES256-SHA:AES128-GCM-SHA256:AES256-GCM-SHA384:AES128-SHA256:AES256-SHA256:AES128-SHA:AES256-SHA:AES:CAMELLIA:DES-CBC3-SHA:!aNULL:!eNULL:!EXPORT:!DES:!RC4:!MD5:!PSK:!aECDH:!EDH-DSS-DES-CBC3-SHA:!EDH-RSA-DES-CBC3-SHA:!KRB5-DES-CBC3-SHA';
           ssl_session_timeout 1d;
           ssl_session_cache shared:SSL:50m;
           ssl_stapling on;
           ssl_stapling_verify on;
           add_header Strict-Transport-Security max-age=15768000;

    }

server {
    listen 80;
    server_name example.com www.example.com;
    return 301 https://$host$request_uri;
}
หลังจากเปลี่ยนเรียบร้อยแล้ว อย่าลืม Save และ Reload service nginx ใหม่นะครับ โดยคำสั่ง
service nginx reload |
แค่นี้ เราก็จะสามารถทำ nginx https Reverse Proxy พร้อมติดตั้ง SSL Certificate จาก Let’s Encrypt เรียบร้อยแล้วครับ